As golf enthusiasts, we understand the importance of practice in honing our skills. The putting green is often where games are won or lost, making it essential for us to develop a reliable stroke. With the advent of home putting labs, we now have the opportunity to create a dedicated space for practice right in our backyards.
A home putting lab allows us to focus on our putting techniques, experiment with different styles, and ultimately improve our game without the need to visit a golf course. Creating a putting lab at home is not just about convenience; it’s about cultivating an environment that fosters improvement and enjoyment. We can design our own practice greens tailored to our specific needs, preferences, and skill levels.
This article will guide us through the process of establishing a home putting lab, from selecting the right location to incorporating technology that enhances our practice sessions.
Key Takeaways
- Selecting the right location and design is crucial for an effective home putting lab practice green.
- Choosing the appropriate putting surface, such as quality artificial turf, enhances practice realism.
- Adding features like bunkers and hazards can simulate real course conditions for better skill development.
- Incorporating technology helps track performance and improve putting techniques efficiently.
- Regular maintenance and proper practice techniques maximize the benefits of your home putting lab.
Choosing the Right Location for Your Home Putting Lab Practice Green
When we embark on the journey of creating a home putting lab, the first step is selecting the ideal location for our practice green. The space should be easily accessible and large enough to accommodate our design plans. Ideally, we want a flat area that receives ample sunlight, as this will help maintain the quality of our putting surface and make our practice sessions more enjoyable.
We should also consider the proximity to our home. A location that is close enough to encourage regular use is essential. If we have a spacious backyard, we can dedicate a section specifically for our putting lab.
Alternatively, if space is limited, we might explore options like balconies or patios where we can create a compact yet effective practice area. The key is to find a spot that inspires us to practice consistently while also being functional.
Designing Your Home Putting Lab Practice Green
Once we have chosen the location for our putting lab, it’s time to dive into the design phase. This is where we can let our creativity shine while ensuring that the layout serves our practice needs. We should consider the size of the green; a larger area allows for more varied practice scenarios, while a smaller space can still be effective with thoughtful design.
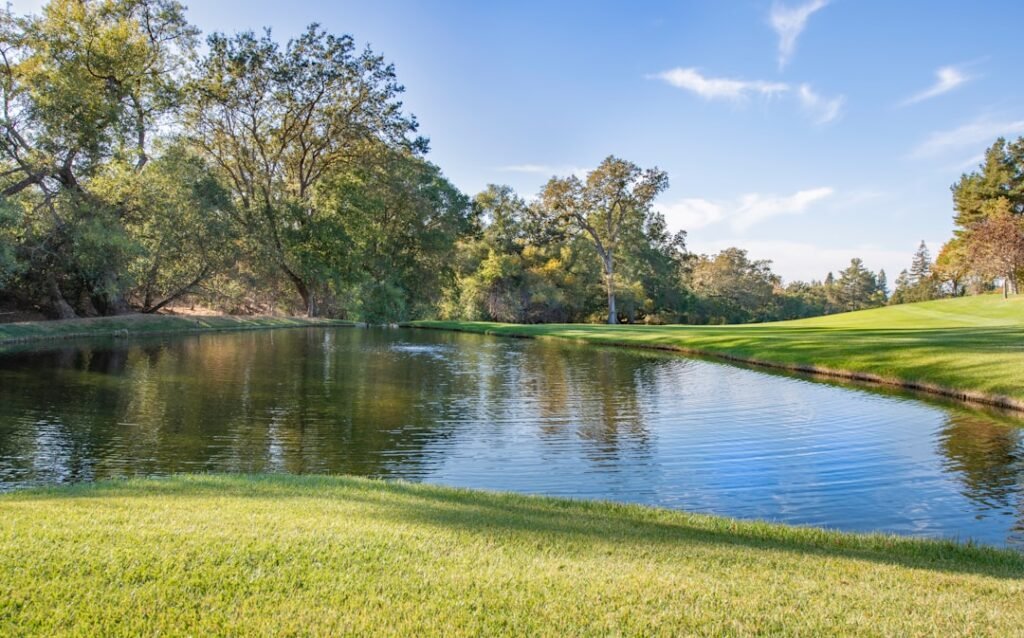
Incorporating different slopes and undulations into our green can simulate real-course conditions, providing us with valuable experience. We might also want to include multiple holes at varying distances to challenge ourselves and keep our practice sessions engaging. Additionally, we can think about adding features like chipping areas or fringe grass to further enhance our training environment.
The design should reflect our goals and preferences, making it a personalized space that motivates us to improve.
Selecting the Best Putting Surface for Your Home Putting Lab Practice Green
The choice of putting surface is crucial in creating an effective home putting lab. We have several options available, including natural grass, synthetic turf, and specialized putting mats. Each surface has its pros and cons, and we should weigh these carefully based on our needs and maintenance capabilities.
Natural grass provides an authentic feel but requires regular upkeep, including mowing, watering, and fertilizing. On the other hand, synthetic turf offers a low-maintenance alternative that can mimic the feel of real grass without the hassle. We can choose from various types of artificial turf designed specifically for putting greens, ensuring that we select one that meets our performance expectations.
Ultimately, the best surface will depend on our personal preferences and how much time we are willing to invest in maintenance.
Installing Artificial Turf for Your Home Putting Lab Practice Green
| Metric | Value | Unit | Description |
|---|---|---|---|
| Green Size | 10 | ft² | Area of the practice putting green |
| Surface Material | Artificial Turf | N/A | Type of surface used for the green |
| Slope Variation | 0-3 | Percent | Range of slope gradients simulated on the green |
| Ball Speed Accuracy | ±0.1 | ft/s | Precision of ball speed measurement during practice |
| Practice Sessions per Week | 5 | Sessions | Recommended frequency for effective training |
| Average Putts per Session | 50 | Putts | Number of putts practiced each session |
| Feedback Delay | 1 | Second | Time delay for receiving scientific feedback |
| Installation Time | 2 | Hours | Time required to set up the putting green at home |
If we decide to go with artificial turf for our putting lab, the installation process is an important step that requires careful planning and execution. First, we need to prepare the ground by clearing any debris and leveling the area where the turf will be laid. This ensures a smooth surface that will enhance our putting experience.
Once the ground is prepared, we can begin laying down the turf. It’s essential to follow manufacturer instructions closely during this process to ensure proper installation. We may need to secure the edges with stakes or adhesive to prevent shifting over time.
After installation, we should take some time to brush the turf fibers upright and allow it to settle before starting our practice sessions. A well-installed putting surface will provide us with a consistent roll and help us develop our skills effectively.
Adding Bunkers and Hazards to Your Home Putting Lab Practice Green
To elevate our home putting lab experience further, we can consider adding bunkers and hazards around our practice green. These features not only enhance the aesthetic appeal of our setup but also provide valuable training opportunities that simulate real-course challenges. By incorporating sand traps or water hazards, we can practice recovery shots and learn how to navigate tricky situations that often arise during actual rounds of golf.
When designing these features, we should think about their placement carefully. Bunkers can be positioned strategically around the green to encourage us to practice different types of shots. We might also want to include chipping areas adjacent to these hazards so that we can work on our short game as well.
By creating a more dynamic practice environment, we can develop a well-rounded skill set that prepares us for various scenarios on the course.
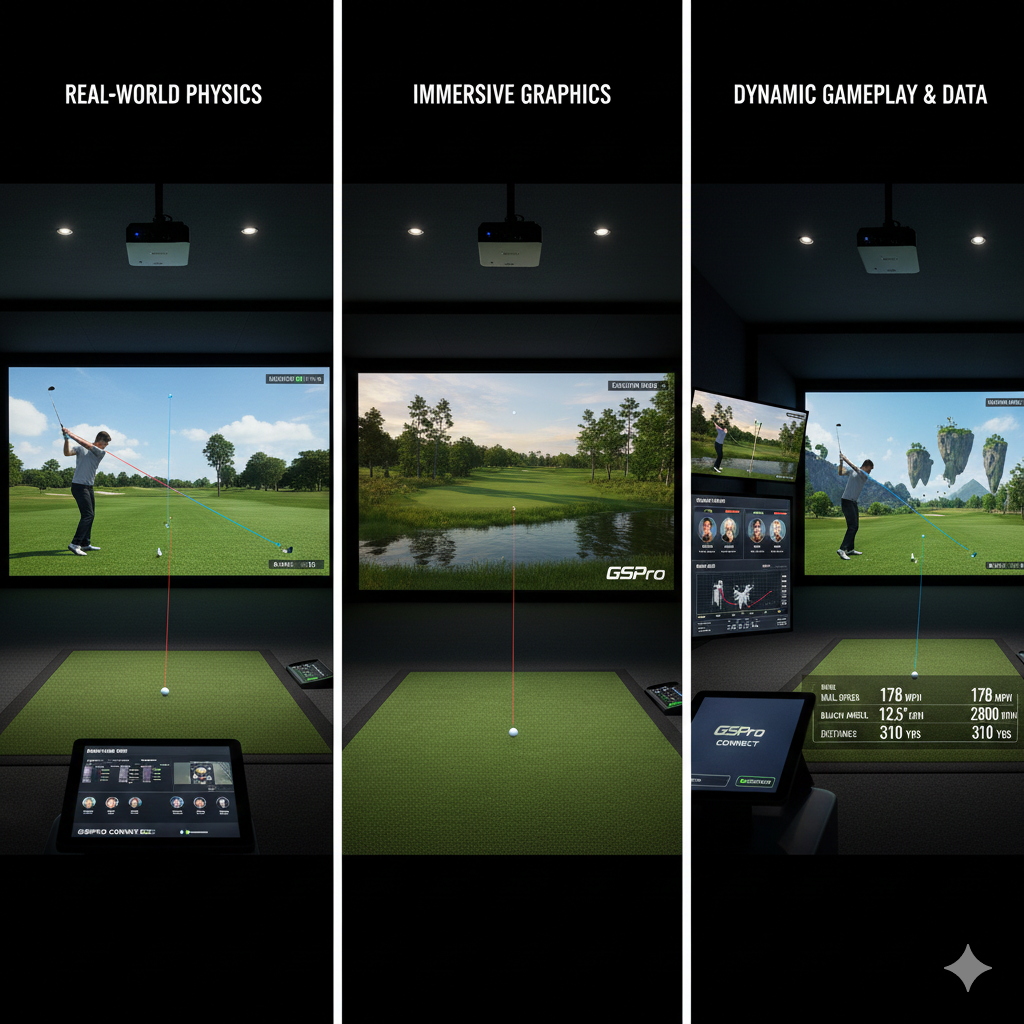
Incorporating Technology into Your Home Putting Lab Practice Green
In today’s digital age, technology plays a significant role in enhancing our golf training experiences. We can incorporate various tools into our home putting lab that provide valuable feedback on our performance. For instance, using a launch monitor or putting simulator can help us analyze our stroke mechanics and identify areas for improvement.
Additionally, there are numerous apps available that track our progress over time and offer drills tailored to our specific needs. By integrating these technologies into our practice sessions, we can gain insights that would be difficult to achieve through traditional methods alone. This data-driven approach allows us to make informed adjustments to our technique and ultimately leads to more effective practice.
Maintaining Your Home Putting Lab Practice Green
Once we have established our home putting lab, ongoing maintenance is essential to ensure its longevity and effectiveness. Regular upkeep will keep our putting surface in optimal condition and enhance our overall practice experience. For artificial turf, this may involve brushing the fibers periodically to prevent matting and ensure a consistent roll.
If we have included natural grass in our design, we must commit to regular mowing, watering, and fertilizing schedules. Additionally, keeping the surrounding area free from debris will help maintain an inviting practice environment. By dedicating time to maintenance tasks, we not only preserve the quality of our putting lab but also reinforce our commitment to improving our skills.
Practicing Proper Putting Techniques on Your Home Putting Lab Practice Green
With our home putting lab set up and maintained, it’s time to focus on practicing proper putting techniques. We should start by establishing a routine that includes warm-up exercises and drills designed to improve specific aspects of our game. For instance, practicing alignment and stance can help us develop consistency in our stroke.
We might also want to incorporate drills that focus on distance control and accuracy. By setting up targets at various distances on our green, we can challenge ourselves to make putts from different angles and lengths. Regularly practicing these techniques will help us build muscle memory and confidence in our abilities when it comes time for actual rounds on the course.
Utilizing Your Home Putting Lab Practice Green for Improvement
The ultimate goal of creating a home putting lab is improvement in our golf game. To maximize this opportunity, we should set specific goals for ourselves based on areas where we want to see progress. Whether it’s reducing three-putts or improving overall accuracy, having clear objectives will guide our practice sessions.
We can also track our progress over time by keeping records of our performance during practice drills. This data will help us identify trends in our game and adjust our training accordingly. By utilizing our home putting lab effectively, we can transform it into a powerful tool for improvement that contributes significantly to our overall golfing success.
Enjoying the Benefits of Your Home Putting Lab Practice Green
In conclusion, establishing a home putting lab offers us an incredible opportunity to enhance our golfing skills in a personalized environment tailored to our needs. From selecting the right location and designing an effective layout to incorporating technology and maintaining the space, each step contributes to creating an effective practice area that fosters improvement. As we invest time in practicing proper techniques and utilizing various drills within this dedicated space, we will undoubtedly see progress in our game over time.
The benefits of having a home putting lab extend beyond just improved skills; it also provides us with a space where we can enjoy the game of golf even when we’re not on the course. Ultimately, by embracing this journey of improvement within our own homes, we can cultivate a deeper love for the game while achieving greater success on the greens.
In addition to “The Putting Lab: Creating a Scientific Practice Green at Home,” you may find valuable insights in the article on how to cultivate a successful home practice culture. This resource offers practical tips on establishing a routine that can enhance your golfing skills effectively. For more information, check out the article here.
FAQs
What is The Putting Lab?
The Putting Lab is a concept or facility focused on creating a scientific practice green at home, designed to help golfers improve their putting skills through precise and controlled practice environments.
How can I create a scientific practice green at home?
To create a scientific practice green at home, you need a smooth, consistent putting surface, accurate measurement tools, and possibly technology such as launch monitors or putting analysis software to track and analyze your putting stroke and ball roll.
What are the benefits of practicing putting on a scientific green?
Practicing on a scientific green allows for consistent conditions, precise feedback, and data-driven improvements, helping golfers develop better stroke mechanics, distance control, and green reading skills.
What materials are recommended for building a home putting green?
Common materials include artificial turf designed for putting, a flat and stable base, and sometimes adjustable slopes or contours to simulate real green conditions. High-quality synthetic grass with a smooth texture is preferred.
Do I need special equipment to analyze my putting at home?
While not mandatory, equipment such as putting mats with alignment guides, launch monitors, high-speed cameras, or smartphone apps can provide valuable data and feedback to enhance practice effectiveness.
Can a home putting green replicate real golf course conditions?
A well-designed home putting green can closely replicate the speed and feel of real greens, though it may not perfectly mimic all natural variables like grain, moisture, and subtle undulations found on outdoor courses.
Is The Putting Lab suitable for all skill levels?
Yes, The Putting Lab and similar scientific practice greens are beneficial for golfers of all skill levels, from beginners to professionals, as they provide a controlled environment to develop and refine putting skills.
How much space is needed to set up a putting green at home?
The space required varies depending on the design, but a minimum of 6 to 10 feet in length is common for effective putting practice, with wider areas allowing for more varied drills and shot types.
How often should I practice putting on a home green?
Regular practice, such as 3 to 5 times per week for 15 to 30 minutes, is recommended to build consistency and improve muscle memory, though frequency can be adjusted based on individual goals and schedules.
Where can I find resources or kits to build a scientific putting green at home?
Resources and kits can be found through golf specialty retailers, online stores, and companies specializing in golf training aids. Additionally, instructional articles and videos provide guidance on DIY setups.